Overview
Note: In 2022, several security researchers and VPN providers flagged ongoing vulnerabilities in Apple’s iOS that were impacting the security of VPNs for iPhone. We’re looking into the issue to find out if the bug has been resolved in iOS 17. In the meantime, we recommend that journalists, activists, and other users handling sensitive information steer clear of iPhone VPNs out of an abundance of caution.
For all of the security and privacy features stuffed into the iPhone, a virtual private network, or VPN, isn’t one of them. (No, Private Relay technically doesn’t count.) Users who want to connect to a VPN on an Apple phone will have to manually configure one or install a third-party VPN service.
If you’re not especially tech-savvy, the good news is that all of the best VPNs we’ve reviewed maintain iPhone apps — though they don’t have the exact same features as those offered by their desktop (and even Android) counterparts. After conducting additional hands-on testing to see how they function on iOS, we’ve got recommendations for users of all budgets and experience levels.
Read on for Mashable’s guide to the best VPN for iPhone.
Our Pick
Best premium VPN for iPhone
Read Mashable’s full review of NordVPN.
Who it’s for:
NordVPN is for power users who want a customizable iPhone VPN with advanced security settings, especially those in it for the long haul: It’s pricey month-to-month, but its yearly plans come in under $5 per month. It also now has the biggest, most globally diverse server network out of all the VPN’s we’ve tried, making it handy for bypassing geo-restrictions on regional content and for traveling. It requires iOS 14.2 or later.
Why we picked this:
NordVPN was often slow to make an initial connection on iOS in my testing — slightly ironic, considering the app opens with a boastful message about it being “the fastest VPN on the planet.” But once the VPN is running, it rewards your patience with a suite of useful security tools and a robust network. (Fortunately, its efficiency improves, too.) From the jump, NordVPN is also admirably transparent about the data it does and doesn’t collect (just login and usage info). You’ll encounter a link to its full privacy policy and a digestible summary of it before you even sign in.
The NordVPN dashboard on iOS revolves around its server network in two forms: There’s a sleek, minimalist map with dots representing different server locations (just tap on one to connect), plus a regular country-by-country list. Not only is said network massive, spanning over 6,200 servers across 111 countries as of May 2024, but it also includes specialty servers for multi-hop connections (“Double VPN“), Tor connections (“Onion Over VPN“), and P2P connections. While NordVPN was pokey at the start of my sessions, it didn’t slow me down once I was finally connected. I was also able to successfully skirt ITVX’s geo-restrictions by hopping on one of its UK servers.
There are a few other tabs on NordVPN’s iPhone app. One of them is dedicated to Meshnet, a feature that lets you route your traffic through your other devices running its app. It’s like having your own little private network. (This isn’t part of the VPN itself, but it’s neat — and newly free.) The others are hubs for your VPN usage statistics and your account profile. That last one is where you’ll find the NordVPN app’s built-in Dark Web Monitor and a settings tab where you can change your protocol, set Siri shortcuts, go invisible to other devices on your network, and more.
The NordVPN app will also occasionally ask you if you want to enable an auto-connect setting that makes sure you’re protected as soon as you get on a network, or a pause setting that lets you snooze the VPN for five to 60 minutes.
NordVPN doesn’t offer split tunneling on its iOS app, but it does have a kill switch, which is enabled automatically.
The Good
The Bad
Details
Read Mashable’s full review of TunnelBear.
Who it’s for:
For those interested in but intimidated by VPN technology, TunnelBear maintains the simplest, most approachable (and most adorable) iOS VPN we’ve tested. It also offers a limited but workable free tier. Frequent streamers should look elsewhere, though, as TunnelBear’s iPhone app couldn’t unblock regional content in testing. It requires iOS 13 or later.
Why we picked this:
The vibes on TunnelBear’s iPhone app are exquisite: It’s a little more hand-holdy than other VPNs (in a good way), with cute animations and refreshingly plain, often punny language. While it can’t circumvent geo-restrictions and its server network is small, it’s fast to connect and great for casual browsing, even on its free tier. (That caps you at 2GB of bandwidth per month, so it’s best for occasional or situational use.) Its paid plans unlock unlimited bandwidth, unlimited simultaneous connections, and city-level server selection for very reasonable yearly rates.
Transparency-wise, TunnelBear’s iOS app links to its privacy policy at login — which is good, though I wish it outlined a few of the main points in the app for skimmers.
TunnelBear’s iPhone dashboard is effectively a pared-down, one-page version of NordVPN, with its server network presented in map and list forms. Tapping a little gear icon in its upper right-hand corner will bring you to an account page, which has a toggle for “VigilantBear,” its kill switch (you have to turn it on manually); an option to start “SplitBear,” its split tunneling tool (for websites only, not apps); and an option to switch your protocol. This is also where you can tweak different aspects of the TunnelBear app experience, including the app’s icon and bear sound effects. (Full disclosure: I found them a little grating but still kind of charming. Make VPNs fun again!)
There’s no multi-hop, FYI, and the “GhostBear” feature that’s available on the Windows and Android of TunnelBear is not available on its iOS app. That would make your encrypted VPN traffic look like normal traffic to third parties, and probably make the app better at unblocking regional content.
Finally, users should be aware of the fact that TunnelBear does not offer any sort of money-back guarantee, and refunds are only available by request. Even if you’re sure you want a paid plan, it’s probably still worth booting up a free account for a trial to confirm it’ll serve you well before you hand your money over.
The Good
The Bad
Details
Read Mashable’s full review of ExpressVPN.
Who it’s for:
Commitment-phobes hunting for a premium VPN app should look into ExpressVPN, which offers a seven-day free trial on iOS with no data or server limits. (Upgrade for 24/7 customer support and support for eight simultaneous connections.) Try to time that trial with your next trip abroad: It’s got a large, widespread server network. Parents will also appreciate its ability to block adult sites. It requires iOS 15 or later.
Why we picked this:
ExpressVPN is a rare example of a premium VPN that offers a free and unrestricted trial on mobile, which is much appreciated considering the steep cost of its subscription plans. I also give it props for its iOS app design, which is clean, modern, extremely easy to navigate, and filled with clear language about its functions, features, and privacy practices. (Right after you log in for the first time, it explains what a VPN is and lays out what its policy covers. Nice and straightforward.)
ExpressVPN’s iPhone dashboard is comprised of a list of its servers, which is quite extensive — though you may not be a fan if you’re a visual leaner, as there’s no accompanying server map. It does come with a “Protection Summary” section that shows how long your phone’s been protected, your VPN’s IP address, and your VPN server’s location. In my testing, connecting to an ExpressVPN server was consistently instantaneous no matter the region — it never struggled to get me online — and it had a negligible impact on my internet speed. I was also able to unblock international streaming content without a hitch.
There are three other tabs on ExpressVPN’s iPhone app besides the main VPN control center: one for a built-in password manager (“Keys”), one for support resources (“Help”), and one for account settings and extra privacy tools, including an IP address checker and leak tests (“Options”).
If you don’t enable them at launch, the app will also occasionally ask if you want to turn on “advanced protection features” that block trackers, malicious sites, ads, and adult sites. These seem to work well — at least, I tried visiting PornHub with that setting on and got an error message that its IP address couldn’t be found.
ExpressVPN’s iOS app does have a kill switch, which you’ll find under Options > Settings > Network Protection. (The desktop version is “Network Lock.”) But you have to toggle it on manually, which isn’t ideal. ExpressVPN on iPhone also lacks its split tunneling tool.
The Good
The Bad
Details
Making picks for this guide to the best VPN for iPhone involved hands-on testing, which I’ll describe in more detail shortly, but it also hinged heavily on guidance from cybersecurity experts. When it comes to the types of things consumers should look for in VPN services, they told me in separate interviews, much of what separates the good from the bad can be gleaned before anything is installed. These experts include:
-
Mallory Knodel, Chief Technology Officer at the Center for Democracy and Technology
-
Nick Feamster, Neubauer Professor of Computer Science at the University of Chicago, Faculty Director of Research at the UChicago Data Science Institute, and founder/co-director of the DSI’s Internet Equality Initiative
-
Paul Ohm, Professor of Law and Chief Data Officer at the Georgetown University Law Center
What the experts said
When you surf the internet freely without a VPN, you’re being tracked online constantly by multiple third parties, including your Internet Service Provider (ISP), search engines like Google, and possibly even your employer or school. Connecting to a VPN means taking your traffic away from them and putting it in the hands of one lone entity instead, conceding exclusive, unfettered access to all of your browsing data. It’s a privilege that needs to be earned, and the true caliber of a VPN ultimately comes down to whether you can wholly believe it’s keeping you safe.
Unfortunately, the VPN industry is notorious for hyperbolic marketing, especially when it comes to privacy practices. This can “give VPN users a false sense of security if they don’t realize that the protections offered are not comprehensive,” according to a Consumer Reports investigation into 16 providers. (Many popular VPNs shout about offering “military-grade” encryption, for example, which isn’t a thing.) It’s unwise to take a provider’s “trust me bro!” claims at face value.
So how do you know for sure if a VPN is trustworthy? A single Google search can be enlightening: A good provider won’t have a long rap sheet for mishandling users’ personal data or succumbing to server breaches, and bad headlines should raise a red flag — including those about a VPN’s ownership or parent company. A swift, effective response to crises and a healthy dose of corporate accountability can offset these concerns in some cases, but I also place a high value on a pristine reputation.
The best VPN services should also be willing to open themselves up to scrutiny. Bragging about a strong “no logs” privacy policy that specifies how users’ personal information gets protected is one thing, but subjecting that policy to independent audits — and making the results public — provides a much higher level of assurance.
The most trustworthy VPNs will also issue regular transparency reports disclosing any requests for data they’ve received from government or law enforcement agencies. (These requests won’t yield anything if a provider’s privacy policy holds up.) Some go the extra mile by offering in-house bug bounty programs to researchers who comb their software and servers for vulnerabilities.
Tests we run on VPNs
I’ve previously written longer, more in-depth reviews of NordVPN, ExpressVPN, and TunnelBear’s MacOS apps, which included assessments of their company policies, histories, and overall reliability. With that knowledge in my back pocket, I conducted additional hands-on testing of their iOS apps for this guide.
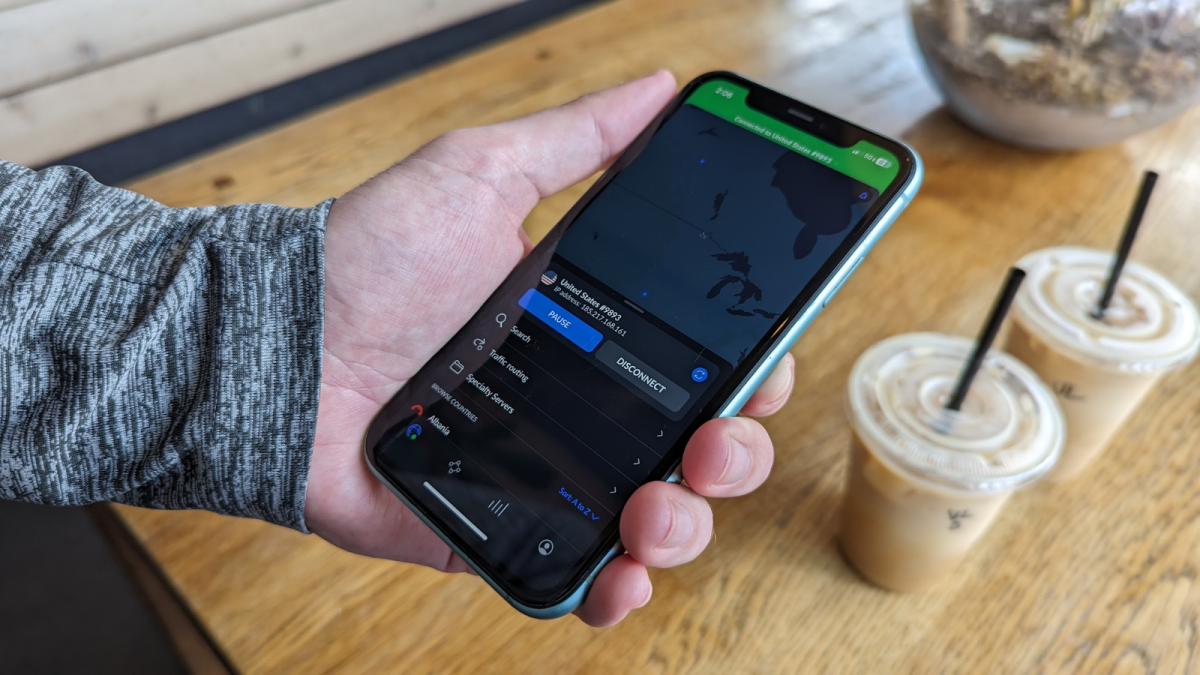
Using my personal iPhone 11 with iOS 16.6.1, I had each VPN connected for approximately eight hours at a time to get a general sense of the user experience as part of a casual, everyday workflow. This involved a handful of performance benchmarks:
DNS leak tests
Often described as “the internet’s phone book,” the DNS (Domain Name System) is basically a back-end directory that translates website domain names into computer-speak, aka internet protocol (IP) addresses. An IP address is a unique number that’s assigned to a device when it’s connected to the internet; it identifies the device’s general location and the name of the ISP.
Without making things overly complicated (bear with me): When you search for a website, your browser sends a query to one of your ISP’s DNS servers to track down its matching IP address(es) so it can send you to that page. Without the DNS, you’d have to type out a long string of numbers every time you wanted to visit a website. Instead of “Mashable.com,” for example, you’d enter “104.18.33.218” or “172.64.154.38” into your search bar.
A VPN is supposed to reroute your DNS queries to its own DNS servers while you’re connected to it — that way, your ISP (and possibly other snoops) can’t see where you are or what sites you’re looking up. If the VPN is faulty, it may continue to send DNS queries to the ISP’s DNS servers, putting your security at risk. That’s the gist of a DNS leak.
Some VPN apps have built-in DNS leak tests that tell you if your connection is secure and whether your real IP address is being hidden. Otherwise, you can perform them via DNSleaktest.com. When I try a VPN, I run its standard test twice: once with the VPN off, and once with it connected.
Trying different use cases
The No. 1 purpose of VPNs is to make it difficult for anyone other than the provider to identify and track your online activity, so every VPN I recommend must do that well — no exceptions. However, VPNs are also widely used to spoof user locations and skirt geo-restrictions on content, especially overseas streaming libraries. (Services like Netflix limit their libraries abroad because of region-specific distribution rights.)
While a VPN will never be disqualified simply because it can’t get users access to geo-blocked content, it’s a plus if it succeeds, so I still test for it. I do so by connecting to one of the VPN’s UK servers from my home in Chicago and running a DNS leak test to see if my IP address changes accordingly, then attempting to watch Love Island UK on the UK streaming service ITVX.
Speed tests
The connection speed of a VPN depends on a lot of different variables, but it will almost always be slower than your regular internet connection, so it’s not a huge factor in my final recs. That said, I try to get an idea of how well a VPN performs by using it for a lengthy period of time and running it through some quick Ookla Speedtests. (I do three of them: one with the VPN off, one with the VPN connected to a local server, and one with the VPN connected to a French server.) If a VPN is noticeably sluggish to the point where it affects usability, I’ll call it out.
A general rule of thumb for any VPN is that your connection speeds will be fastest when you’re connected to a server that’s geographically close to your actual location.
Other important details
I also took the following factors into account as I used each VPN on iOS and decided whether to recommend it, listed in no particular order:
Included features
Most premium VPNs come with similar privacy tools, so I don’t encounter major provider-to-provider discrepancies in this regard. Still, it’s worth noting some of the important ones I look out for:
-
A kill switch will immediately disconnect your device from the internet if your VPN drops. (This one’s non-negotiable.)
-
Support for multi-hop connections that route your traffic through two or more of the VPN’s servers. This adds an extra layer of protection.
-
Split tunneling, a tool that sends some of your traffic through the VPN and some outside it to conserve bandwidth, can be useful for streaming and gaming.
Oftentimes, providers will also bundle their VPN with additional security features like malware/adware blockers, data breach detectors, and cloud storage. These won’t make the VPN itself any better, but they’re good to have alongside your go-to antivirus software and password manager. (If you have to choose between a reputable VPN or one that comes with a bunch of add-ons, always go with the former.)
Protocol type
A VPN’s protocol is the set of instructions that determine how data gets communicated between its servers and your devices. Many VPN providers have developed proprietary protocols within the past few years, but OpenVPN remains the most popular and widely respected option: It’s stable, secure, and open-source, meaning anyone can inspect its code for vulnerabilities. WireGuard is another good pick that’s newer than OpenVPN and supposedly faster.
Encryption type
A VPN protects your data by encrypting it, or scrambling it up into unreadable “ciphertext” that can only be decoded with a secret key or password. Virtually all premium VPNs use Advanced Encryption Standard (AES) 256-bit encryption, which is pretty much uncrackable to third parties.
Server network size and distribution
Picking a VPN with a large server network means there’s a lower likelihood of you sharing one with a bunch of other users, which is especially valuable for streaming (since there’s more bandwidth to go around).
Relatedly, a VPN with a geographically diverse network of servers in many different parts of the world will make it easier for you to spoof specific locations and find one close to you to optimize connection speeds. Most premium VPNs maintain servers throughout the Americas, Europe, Asia, and Australia; few have a big presence in Africa.
Number of simultaneous connections
Most VPNs can be used on five to 10 devices per account (depending on the provider), which should be plenty for individual users. A handful of them support unlimited simultaneous connections to better serve bigger households.
Customer support options
Users should have access to some kind of help around the clock in case an issue arises with their VPN connection or account, whether it’s by phone, email, or live chat. (Online help forums and tutorials are nice, but not enough on their own.) I also give preference to VPNs that offer some kind of money-back guarantee; in most cases, it’s 30 days long.
Overall value
Premium VPN providers typically charge anywhere from $2 to $12 per month for access to their clients, depending on the subscription length. It’s easier to justify the higher end of that spectrum if it gets you a reliable and responsible VPN with some useful security features.
Ease of use
Some VPNs are more intuitive and beginner-friendly than others.
It’s important to note that many popular VPN providers posit their jurisdiction, or the location of their headquarters, as something that can have serious privacy implications based on local surveillance laws (such as the Five, Nine, and 14 Eyes alliances). Without getting too in the weeds, the experts I spoke to said the average consumer shouldn’t put a big stake in these claims, and that authorities will get access to user data one way or another if the need is great enough. What’s more concerning, they added — to bring things full circle — is whether any data is being retained by a VPN provider in the first place.
If anything, users might be better off choosing a VPN headquartered in a country with strong consumer protections against deceptive marketing (like the U.S. and many countries in the European Union). These could come in handy if a provider’s privacy policy was ever questioned.
Note: Ookla is owned by Mashable’s publisher, Ziff Davis.
Frequently Asked Questions
You can use a VPN on an iPhone in one of two ways: by manually enabling it, or by installing a third-party iOS VPN app.
To manually set up a VPN: Open your iPhone’s Settings app, hit “VPN,” and then tap “Add VPN Configuration…” You’ll be taken to a page that prompts you to pick a VPN protocol (IKEv2, IPsec, or L2TP) and enter a description, a server, a remote ID, a username, and a password. You can also enable a proxy server manually or automatically, if you’re using one. Once those fields are filled out, tap “Done” to connect to the VPN.
To get a third-party VPN app up and running: You’ll need to download your choice of app from the App Store, open it, and log into your account (or sign up). Once you’re in, or once you tap the connect button for the first time, you’ll get the following pop-up message:
“‘[App name]’ Would Like to Add VPN Configurations. All network activity on this iPhone may be filtered or monitored when using VPN.“
After you tap “Allow,” your iPhone will whisk you over to its “Add VPN Configurations” page (under Settings > VPN ). You’ll need to enter in your iPhone’s password to allow the VPN app to fill out its profile. Once that’s done, your iPhone will take you back over to the VPN app itself, which will immediately connect you to a nearby server. You can choose other servers and enable different features (if available) from there.
At some point in this process (either right before or right after you add the VPN configuration), you’ll get a message asking if you want the app to send you notifications. You can hit “Allow” or “Don’t Allow.”
The iPhone does not come with a built-in VPN. The closest thing Apple offers is a feature called Private Relay, which is available on handsets running iOS 15 or later with a paid iCloud+ subscription. It will hide your browsing activity and IP address, but it’s different from a standard VPN in a couple critical ways:
-
It only hides your browsing activity in Safari.
-
The location of the new IP address it gives you will either be in your same general area or in your same country and time zone (your choice). In other words, it doesn’t let you spoof different locations to unblock geo-restricted content.
-
It lacks important security extras like a kill switch.
Haley Henschel is a Chicago-based Senior Shopping Reporter at Mashable who reviews and finds deals on popular tech, from laptops to gaming consoles and VPNs. She has years of experience covering shopping holidays and can tell you what’s actually worth buying on Black Friday and Amazon Prime Day. Her work has also explored the driving forces behind digital trends within the shopping sphere, from dupes to 12-foot skeletons.
Haley received a B.A. in Journalism from the University of Wisconsin-Madison and honed her sifting and winnowing skills at The Daily Cardinal. She previously covered politics for The Milwaukee Journal Sentinel, investigated exotic pet ownership for Wisconsin Watch, and blogged for some of your favorite reality stars.
In her free time, Haley enjoys playing video games, drawing, taking walks on Lake Michigan, and spending time with her parrot (Melon) and dog (Pierogi). She really, really wants to get back into horseback riding. You can follow her on X at @haleyhenschel or reach her via email at [email protected].