We may earn a commission when you buy through links in our articles. Learn more.
What are the best builds in Throne and Liberty? That’s not an easy question to answer in a game with 21 unique weapon combinations, all of which become named classes in-game. Each of these weapon types has 12 active skills, 7 passive skills, weapon masteries, specializations, and more – there is a lot to consider. We’ve gone ahead and put together four of the most potent builds available in-game: Crusader, Sentinel, Scorpion, and Darkblighter.
If you’re just getting started in Throne and Liberty we have a Throne and Liberty weapon tier list so you know which armaments are best to take into battle. Furthermore, if you no longer like the look of your in-game avatar, you might want to read up on how to change your Throne and Liberty appearance.
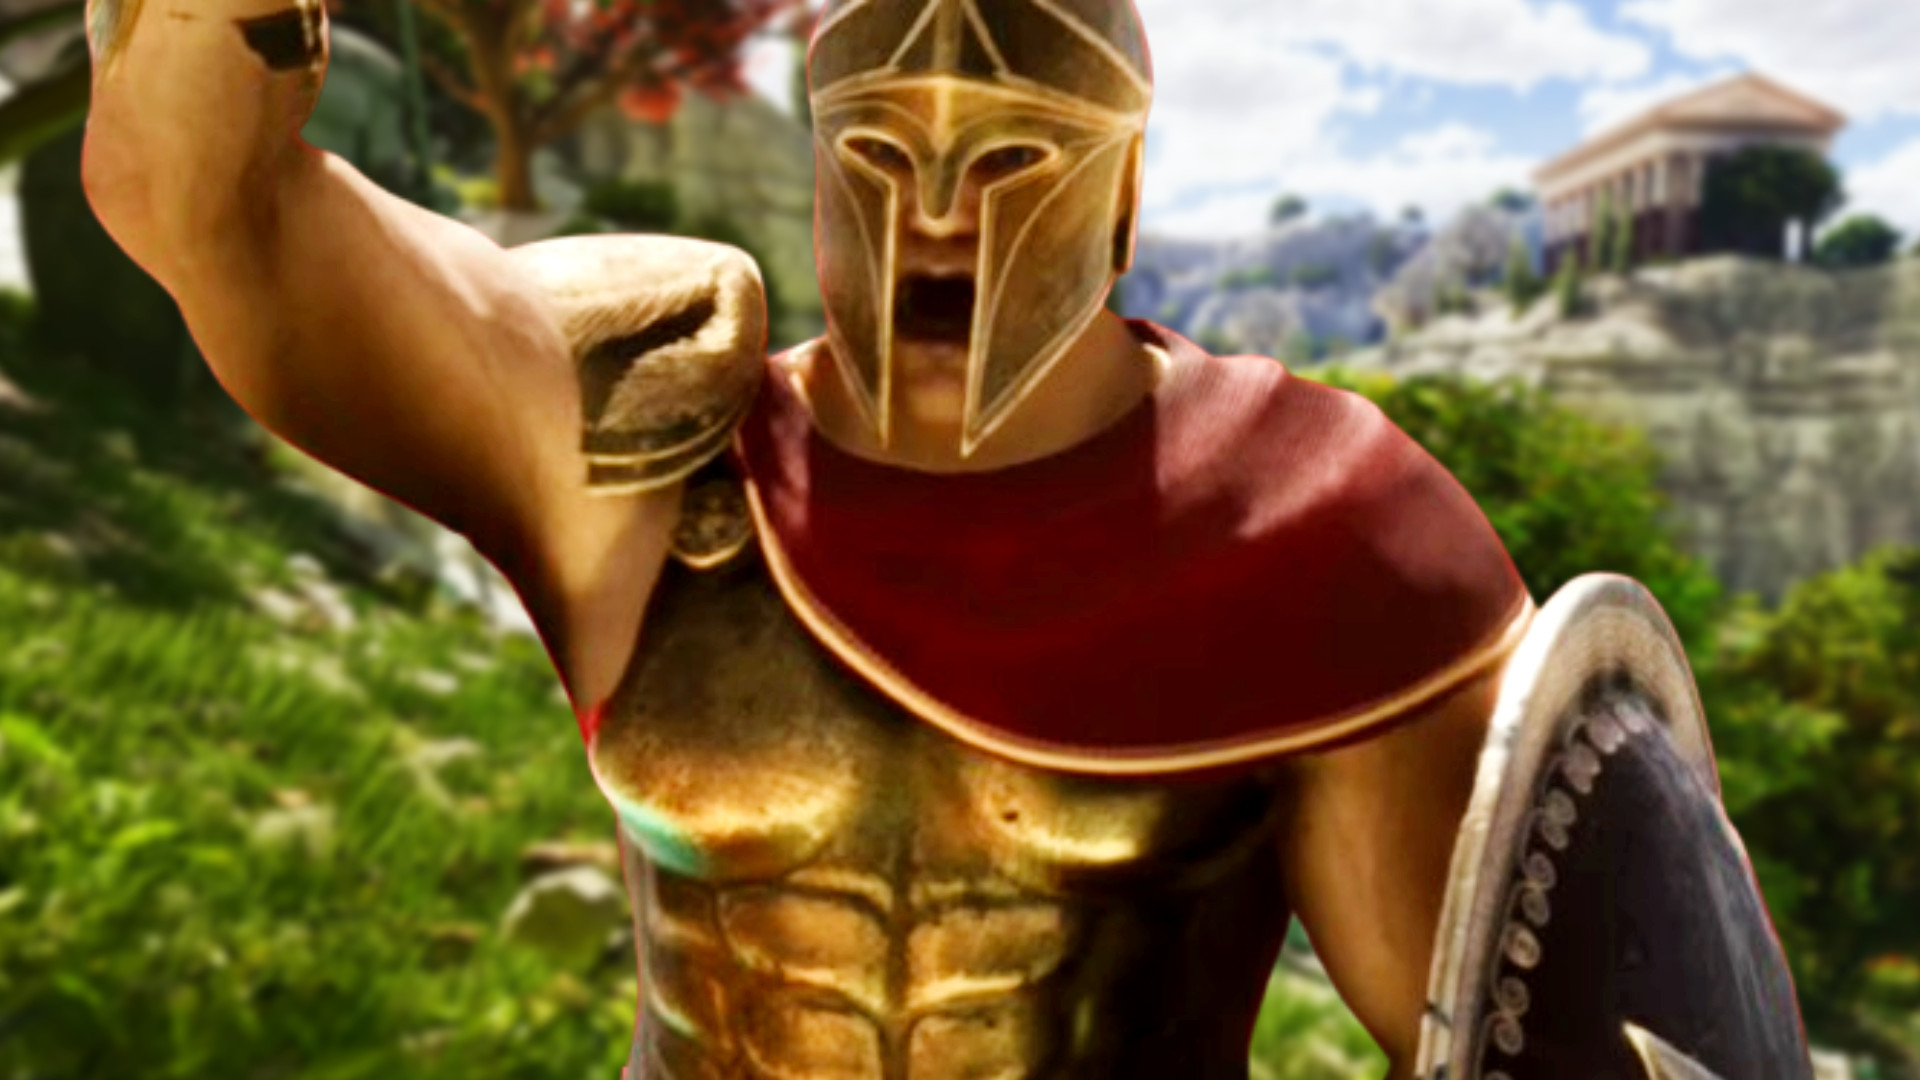
Best Throne and Liberty Crusader build
Here is our greatsword/sword Crusader build in Throne and Liberty:
- Attribute point distribution:
- Strength: 27
- Dexterity: 27
- Wisdom: 10
- Perception: 25
- Key active skills: Valiant Brawl, Chain Hook, Stunning Blow
- Key passive skills: Robust Constitution, Gerad’s Patience, Indomitable Armor
- Defensive skill: Shield Survival Technique
- Weapon A mastery: 9 in Provoke and Counter, 6 in Boss, 0 in Collision
- Weapon B mastery: 6 in Charge, 9 in Incapacitate, 0 in Face Off
- Guardian: Lady Knight Karmarshea
- Best Weapon A: Nirma’s Sword of Echoes
- Best Weapon B: Tevent’s Warblade of Despair
- Best armor set(s): Imperator set (Field General armor)
This pure tank Crusader build is focused on keeping you and your allies alive while surviving the heaviest hits Throne and Liberty’s monsters and opposing players have to offer. It stays close with mobile greatsword skills and keeps defenses high with sword and shield skills. Furthermore, it has a bit of damage, meaning it isn’t totally useless without a supporting cast.
However, if you find yourself taking forever to defeat enemies, we don’t recommend swapping out to a third weapon but rather advise taking on more greatsword skills and using the greatsword more often. The sword and shield skills, you see, aren’t typically that great at dealing damage comparatively. This would also require you to ditch some sword-specific passives for greatsword passives such as Vital Force.
Attribute points
The attribute spread for this build is relatively easy to understand. After ditching Wisdom as we’re not concerned with mana and mana generation, focus on raising Strength and Dexterity to 27 each, prioritizing Strength first. Not only will this give you a large health pool, it will also provide you with a not-insubstantial amount of evasion and critical hit chance. Don’t worry – you’ll get a lot more Strength from equipment later on.
Finally, round out your attributes by bringing Perception up to 25. This will help your minimum and maximum damage, hit chance, and stun chance, along with how long buffs last.
Active skills
Here’s the best active skills for this sword/greatsword Crusader build:
- Valiant Brawl: Attack 3 times for decent damage
- Precision Dash: Dash toward and through opponents
- Stunning Blow: Deal damage and possibly stun opponents
- Ascending Slash: Deal damage and knock stunned opponents prone
- Death Blow: Deal massive damage against stunned opponents
- Guillotine Blade: Deal massive damage to prone or shocked targets
- DaVinci’s Courage: Provide max health, health regen, and attack speed increase for all party members nearby
- Shield Strike: Deal damage and decrease opponent’s defenses
- Counter Barrier: Increase shield block chance and retaliate on block/dodge
- Chain Hook: Pull an enemy toward you or pull yourself toward a boss monster, drawing aggro
- Stalwart Bastion: Increase damage reduction for you and your allies
- Provoking Roar: Chance to draw nearby enemy aggro
Do note that some skills change dramatically when specialized in certain ways; experiment at your leisure to find which suits you best, but try not to stray too far from defensive bonuses.
Passive skills
Here’s the best passive skills for this sword/greatsword Crusader build:
- Robust Constitution: Health generation and max health increase
- Raging Frenzy: Damage boost if 3 or more enemies nearby
- Indomitable Armor: 25% chance to increase defenses when hit
- Cold Warrior: Heavy attack chances increase against stunned or shocked targets
- Gerad’s Patience: Crowd control resistance increases on successful dodge/shield block
- Impenetrable: Defenses increase proportional to the amount of nearby enemies
- Resilient Mind: Mana restored on dodge/shield block
- Aegis Shield: Defense greatly increased by shield block % chance
Defensive skill
Shield Survival Technique fits this build better than Iron Point Parry as the former can restore a large amount of health upon a successful parry, making it the better option for a tank. Furthermore, it changes into Retaliatory Strike upon a successful parry. While not as damaging as Iron Point Parry’s Murderous Draw, it’s still a nice little bonus.
Skill upgrade priority
The skill upgrade priority is fairly straightforward with this build. Do note that some skills, such as Guillotine Blade, unlock at a higher rarity, so you don’t have to worry about upgrading them all the way from Uncommon to Epic.
While playing through early PvE content, you’ll want to focus on your greatsword damaging skills like Valiant Brawl and Death Blow to clear this content quicker. Get these to Rare, along with Precision Dash, Stunning Blow, and Ascending Slash.
Then you can focus on the defensive sword and shield skills, prioritizing Shield Strike and Counter Barrier, as you’ll use them the most often to deal out even more damage. Once these are at Rare, upgrade the remaining skills: DaVinci’s Courage, Chain Hook, Stalwart Bastion, and Provoking Roar – though if you’re mostly playing solo you should leave Provoking War until finishing the main story quest.
Circle back to level the rest of your action skills to Epic.
For passive skills, once again focus on damaging passives first. These are Cold Warrior and Raging Frenzy. During PvE content, you might want to speed things up by slotting in Vital Force over some other defensive skills. Once these are at the Rare level, move onto your other defensive passives before circling back to raise them to Epic in the same order.
Skill rotation
Now that we’ve gotten the skills out of the way, here’s the general skill rotation you should keep in mind while playing in both PvE and PvP content. As a tank, however, you’ll have to adapt to the situation at hand and use your defensive skills at key moments.
At the start of each encounter, if you’re not close to your primary opponent, use Precision Dash to close in on them before slamming them with the Stunning Blow into Ascending Slash/Death Blow combo. Both Valiant Brawl and Guillotine Blade are great to use here for extra damage.
Otherwise, if you’re up against an opponent targeting you, use your Shield Strike into Counter Barrier. After that, it’s pretty much situational for when you’ll use DaVinci’s Courage and Stalwart Barrier to protect yourself and allies. You should typically save them for when your opponents are using powerful moves against you or your allies.
Chain Hook is great to grab enemies that have targeted your allies while you’ll want to use Provoking Roar for the same reason. A great combo we found is Precision Dash into Provoking Roar to protect a squishy ally if Chain Hook is on cooldown.
Weapon mastery
For your sword and shield, consider investing in the following weapon mastery trees:
- Provoke and Counter: 9 points to Indomitable Spirit
- Boss: 6 points to All-Out Defense
- Collision: 0 points
First and foremost, you should invest in Provoke and Counter up until Impregnable Stance for the shield block chance before moving onto the Boss tree for All-Out Defense, which will increase your defenses against bosses. After that, finish the Provoke and Counter tree. We don’t use any skills that make use of Collision so we avoid that tree.
As for your greatsword, invest in the following trees:
- Charge: 6 points to Overcome Snare
- Incapacitate: 9 points to Firm Resolution
- Face Off: 0 points
At first invest all your mastery points into the Incapacitate tree to make sure your Stunning Blow connects more often. After that, put the 6 points into Charge in order to grab some great defensive bonuses and resistance to bind, which is more prevalent than you think.
Guardian
The best Guardian for this sword/greatsword build is Lady Knight Karmarshea. Despite all the defensive, tanky bonuses you’re specced into, sometimes you’re just going to get overwhelmed, and Lady Knight Karmarshea’s mana-based shield and cooldown buff is often a lifesaver that can keep you in a difficult fight longer than you otherwise would be able to.
Best equipment
Don’t worry too much about equipment for this sword/greatsword build until you’ve reached level 50. You should focus on equipment of any rarity that increases your Strength first and foremost before looking at defensive stats, whether that’s max health or debuff resistances. Some of the best gear can take a while to grind for, so stick with what you have closest to the equipment below best. We ourselves haven’t managed to pull all the equipment listed below, after all.
Best weapons
The best weapons for this sword/greatsword Crusader build are Nirma’s Sword of Echoes and Tevent’s Warblade of Despair.
Nirma’s Sword of Echoes does increase Wisdom which you do not need; on the other hand, it has a chance to stun the target briefly when using Shield Strike. That’s an incredibly valuable effect. It’s dropped by the Nirma, a guild raid boss.
Tevent’s Warblade of Despair not only increases Strength, but it also will cause a small explosion every time you manage to stun or shock an opponent, increasing your damage output on an incapacitated target further. It’s looted from defeating the World Boss Tevent in the Ruins of Turayne. Consider equipping the Blessed Templar Cloak for further defensive bonuses.
Best armor
The best armor for this sword/greatsword Crusader build is the Imperator Set, also known as the Field General set. It isn’t a particularly rare set as it drops from several different containers in dungeons and high-level enemies after reaching level 50.
You’re not going to get this armor until late in the game, but a good stopgap is the Resistance set, which provides a lot of defensive bonuses.
For accessories, seek out those that provide bonuses to Strength first and foremost, then Perception, and then Dexterity. Additional stun chance isn’t a bad idea, either, as seen with the Etched Alabaster Band.
Best Throne and Liberty Sentinel build
Here is our greatsword/staff Sentinel build in Throne and Liberty:
- Attribute point distribution:
- Strength: 30
- Dexterity: 10
- Wisdom: 29
- Perception: 20
- Key active skills: Precision Dash, Stunning Blow, Frost Smokescreen, High Focus
- Key passive skills: Vital Force, Cold Warrior, Forbidden Sanctuary
- Defensive skill: Iron Point Parry
- Weapon A mastery: 6 points in Charge, 9 points in Incapacitate, 0 points in Face Off
- Weapon B mastery: 9 points in Mana, 6 points in Destroy, 0 points in Attribute
- Guardian: Vampire Slayer Ezekiel
- Best Weapon A: Tevent’s Warblade of Despair
- Best Weapon B: Staff of the Umbramancer
- Best armor set(s): Imperator set (Field General armor)
This frosty Sentinel build leans heavily into stunning opponents with a greatsword while using the ice skills from the staff to maintain mobility and stay out of dangerous situations, despite some generally good survivability otherwise. It’s a DPS wrecking ball and an off-tank that will require some support from a Wand or Longbow user to keep you from getting overwhelmed.
If you do find yourself struggling while running PvE content without proper support, consider switching the staff out for a sword and shield to give yourself a lot more defensive utility. Change the staff skills to the likes of Stalwart Bastion and Counter Barrier and you should be more readily able to survive. You don’t need to edit your attribute points and can swap back to the staff later.
Attribute points
Strength is the main attribute for this build, so we raise it to the 30 soft cap and stop there, pulling more strength from equipment later. A high Strength allows you to hit harder and maintain a high health pool when darting into the fray.
The secondary attribute is Wisdom, granting large amounts of mana and mana regeneration. It also reduces cooldown speed, allowing you to use skills like Precision Dash and Stunning Blow far more often.
Next up is Perception, which we throw 10 attribute points into to raise our chance to hit attacks and apply the stun status effect – a key part of this build. We’ll look to get more Perception from armor and accessories.
Finally, we leave Dexterity as it is because we aren’t interested in critical hits and attack speed.
Active skills
Here are the best active skills for this greatsword/staff Sentinel build:
- Precision Strike: Great for closing in on enemies or dealing damage to multiple
- Stunning Blow: Possibly stuns target for several seconds
- Devastating Smash: Deals damage in a radius with a chance to stun
- Ascending Slash: Possibly knocks targets prone with a higher chance against stunned enemies
- Valiant Brawl: Deals high damage with three hits. Heavy attacks reduce cooldown
- Gaia Crash: Deals damage over a wide area
- Devastating Tornado: Deals damage within area and increases movement speed
- Frost Smokescreen: Decreases movement speed of enemies over a wide area and teleports you away
- Ice Spear: Throws an ice spear that can decrease the movement speed of the target
- Icebound Tomb: Chance to freeze enemies in place or slow their movement speed
- High Focus: Increases cooldown speed and movement speed
- DaVinci’s Courage: Increases health and attack speed of nearby allies
Do note that some skills change dramatically when specialized in certain ways; experiment at your leisure to find which suits you best. The goal here is to make sure your stun chance is as high as possible, damage output second.
Passive skills
Here are the best passive skills for this greatsword/staff Sentinel build:
- Cold Warrior: Heavy attack and critical chance increased against stunned opponents
- Victor’s Morale: Restore health and mana after dealing damage with skills
- Barbarian’s Dash: Movement speed increased after using movement skills
- Raging Frenzy: Skill damage increased with 3 or more enemies nearby
- Mana Amp: Max health and mana massively increased
- Frost Master: Movement speed debuffs on enemies are stronger
- Indomitable Armor: Chance to increase defenses on getting hit
- Forbidden Sanctuary: Skill damage increases but mana cost also increases
Defensive skill
Iron Point Parry wins out over Mystic Shield as it has a chance to stun, which this build is centered around. Furthermore, Mystic Shield turns into a lighting-based skill after activation which this build isn’t made to utilize, while Iron Point Parry becomes the heavy-hitting Murderous Draw.
Skill upgrade priority
The skill upgrade priority is fairly straightforward with this build. Do note that some skills unlock at a higher rarity, so you don’t have to worry about upgrading them from Common to Epic.
In the early levels, you’ll want to focus on Stunning Blow as increased stun and shock duration will help keep even the toughest PvE enemies in check. Devastating Smash is also good to invest in as it increases the skill’s stun chance further. Raise these to Rare.
Then focus on your damage-dealing attacks: Precision Strike, Ascending Slash, Valiant Brawl, Gaia Crash, Devastating Tornado, and Ice Spear.
After that, your utility skills, starting with Frost Smokescreen, before moving into Icebound Tomb, High Focus, and DaVinci’s Courage, cycling them into Rare and then Epic.
As for leveling passive skills, focus on Cold Warrior and Mana Amp at first as they’ll help most with your stun-focused build. Then, move onto Raging Frenzy and Forbidden Sanctuary for a higher skill damage boost. After that update the remaining passives.
Skill rotation
Now that we’ve gotten the best skills out of the way, this greatsword/staff Sentinel build functions fairly similarly in both PvE and PvP, though it depends on how many opponents you’re up against.
At the start of each encounter, you’ll want to use Precision Strike to close in on your opponent as quickly as possible before immediately casting Stunning Blow. If Stunning Blow fails or there are multiple opponents around you, hit them with a Devastating Strike into Ascending Slash to knock them prone.
From here, you’ll want to cycle through the rest of your damaging skills, concluding with Devastating Tornado for the movement speed buff, before hitting Frost Smokescreen and teleporting away to allow your skills time to recharge. If you have the mana, you can throw an Ice Spear to deal extra damage. If you don’t, activate High Focus to regain some.
With your mana regained and health restored, use Precision Strike to once again rush into the fray and repeat the above process until victory. That said, don’t be afraid to use Frost Smokescreen to escape a difficult situation.
With allies in the vicinity, make sure to use DaVinci’s Courage whenever possible to keep them healthy and attacking hard. It may take a while to learn when best to use this skill in PvP, but in general wait for an opportunity – such as a stunned opponent – to proc this skill so you can decimate a single target together.
Weapon mastery
For your greatsword, you’ll want to distribute your points as follows:
- Ranged Defense: 6 points to Overcome Snare
- Recover: 9 points to Firm Resolution
- Melee Hit: 0 points
The Recover line is your priority as it comes paired with stun change and mana regeneration bonuses, along with a valuable stun time increase. 6 points in Ranged Defense allow you to decrease cooldown speed a little while making yourself a bit more resistant to certain debuff effects. Nothing for Melee Hit as we’re not too concerned about damage boosting with this build.
For your staff, lean into the following:
- Mana: 6 points to Mana Blessing
- Destroy: 9 points to Strange Spacetime
- Attribute: 0 points
Destroy is key here as it provides a cooldown timing increase which will allow you to use the likes of Stunning Blow more often. The mana line, on the other hand, simply provides more mana regeneration, as this is a rather mana-hungry build.
Guardian
The best Guardian for this greatsword/staff Sentinel build is Vampire Slayer Ezekiel as he increases defense while also providing a health-draining effect to keep you alive. He’s perfect to proc when you’re running out of mana.
Best equipment
Don’t worry too much about equipment for this greatsword/staff Sentinel build until you’ve reached level 50. Just go with the equipment and greatsword/staff combo that have any bonuses to stun chance or stun duration. After that, look for armor and accessories that increase Perception and anything to do with stun. Even after that, some of the best gear can take a while to grind for, so stick with what you have closest to the equipment below best.
Best weapons
The best weapons for the greatsword/staff Sentinel build are Tevent’s Warblade of Despair and Staff of the Umbramancer.
Tevent’s Warblade of Despair not only increases Strength but also causes a small explosion every time you manage to stun or shock an opponent, increasing your damage output on an incapacitated target further. It’s looted from defeating the World Boss Tevent in the Ruins of Turayne.
The Staff of the Umbramancer is less rare and has no special ability, but instead increases both your Strength and Perception, making it a great secondary weapon as you won’t often switch to it. It’s looted from several different Elite level enemies after reaching level 50.
Best armor
The best armor set for this greatsword/staff Sentinel build is the Imperator Set, also known as the Field General set. It isn’t a particularly rare set as it drops from several different containers in dungeons and high-level enemies after reaching level 50.
You’ll want to focus on max health and Strength increase until you can find this armor, so it’s not a terrible idea to craft the Decorated Champion Armor set.
However, it increases Strength, Perception, and a little bit of Dexterity while also granting a higher melee heavy attack chance and mobility bonus from mobility skills, of which this build uses a few.
For accessories, seek out gear that provides the most max health alongside any bonuses to Perception and then Strength.
Best Throne and Liberty Scorpion build
Here is our crossbow/dagger Scorpion build in Throne and Liberty:
- Attribute point distribution:
- Strength: 17
- Dexterity: 30
- Wisdom: 17
- Perception: 25
- Key active skills: Inject Venom, Multi-Shot, Explosive Trap, Quick Fire
- Key passive skills: Eagle Vision, Murderous Energy, Corrupt Nail, Bloodlust Stack
- Defensive skill: Block Blade
- Weapon A mastery: 0 points in Regen, 6 points in Move, 9 points in Chain Fire
- Weapon B mastery: 3 points in Disguise, 3 points in Poison, 9 points in Assassination
- Guardian: Green Ranger Elowen
- Best Weapon A: Queen Bellandir’s Toxic Spine Throwers
- Best Weapon B: Rex Chimaerus’s Fangs
- Best armor set(s): Phantom Wolf set
This all-out DPS Scorpion build focuses mostly on applying debuffs before using those debuffs to deal massive damage to opponents – all from a distance with crossbows as the primary weapon. The daggers are mostly here to borrow poison-based skills from along with some evasion techniques should enemies get tired of you melting their health bars.
This build is largely fine in both PvE and PvP but requires support as it’s pretty much a glass cannon and focuses on a single target at a time. A third weapon to swap out for to give yourself some defensive utility would be the Longbow, as it has several healing skills and Ensaring Arrow, which can give you a few precious seconds to deal damage against a powerful foe. It also has a few passive skills that increase health regeneration – not a bad bonus. Otherwise, consider using the staff for more area-of-effect damage if you’re going up against lots of PvE mobs.
Attribute points
As you’d expect, Dexterity is the main attribute point for this build, so hit the 30 soft cap and stop there, pulling more Dexterity from armor and accessories later. A high Dexterity will give you better attack speed and higher ranged critical hit damage, both of which this build leans into.
After that level Perception to 25 to increase our chances to hit and apply weaken debuffs, which in turn will increase the damage of our skills such as Quick Fire. Debuffs aren’t a core part of this build but rather a means to an end to do more damage.
Finally, spread the remaining points evenly through Strength and Wisdom for some defensive bonuses and mana regeneration, respectively.
Active skills
Here’s the best active skills for this crossbow/dagger Scorpion build:
- Inject Venom: Allows attacks to build stacks of poison
- Multi-Shot: Deals damage and applies weaken debuff
- Explosive Trap: Deals damage and applies weaken debuff
- Quick Fire: Attack several times and deal more damage to weakened targets
- Mother Nature’s Protest: Additional projectile attacks for a short time
- Merciless Barrage: Deal a huge amount of stacking damage
- Selfless Diffusion: Off-hand weapon will deal more damage and weakening targets will decrease cooldowns
- Wind Snatcher: Debuff an opponent, possibly slowing their attack speed and binding them
- Nimble Leap: Leap in the targeted direction and increase critical damage
- Shadow Strike: Move behind a target and possibly bind them
- Fatal Stigma: Decrease healing for enemies in target area and increase poison damage
- Camouflage Cloak: Stealth and remove movement binding effects.
Do note that some skills change dramatically when specialized in certain ways; experiment at your leisure to find which suits you best. At the same time, make sure you’re not nerfing your damage output by doing so.
Passive skills
Here are the best passive skills for this crossbow/dagger Scorpion build:
- Eagle Vision: Increases chance to hit and weaken chance
- Murderous Energy: Poison damage increased
- Bloodlust Stack: Increases skill damage and eventually critical damage
- Corrupt Nail: Increases weaken chance
- Destructive Fang: Reduces defenses of poisoned enemies
- Ambidexterity: Increases off-hand weapon damage
- Nature’s Power: Increases bonus damage after using a movement skill
- Wrathful Edge: Increases critical damage
Defensive skill
Block Blade wins out over Rupturing Parry as after a successful parry the former will change to a poison attack, allowing you to further stack damage on your opponent. It also gives a brief stealth window to help you drop aggression against multiple foes. Rupturing Parry isn’t a bad choice as it can bind your opponent, but we found the former a bit more useful.
Skill upgrade priority
The skill upgrade priority is a little complicated with this build. Do note that some skills, such as Wind Snatcher, unlock at a higher rarity, so you don’t have to worry about upgrading them from Uncommon to Epic.
In the early levels, you’ll want to prioritize leveling Inject Venom and Quick Fire to Rare as they’re your bread-and-butter combo; doing so will increase your damage exponentially.
After that, focus on your other damage-dealing skills to Rare in whichever order you prefer: Multi-Shot, Explosive Trap, and Merciless Barrage. Then, shift to upgrading your utility skills to Rare as well before circling back to leveling the others to Epic.
As for leveling passive skills, get Eagle Vision, Murderous Energy, Bloodlust Stack, and Corrupt Nail to Rare to ensure you’re dealing the most damage possible before upgrading the rest in whatever order you see fit before circling back to bring the others up to Epic.
Skill rotation
Now that we’ve gone in-depth with the skills, this crossbow/dagger Scorpion build plays a bit differently in PvE and PvP; however, the base skill rotation is much the same.
At the start of each encounter, you’ll want to find the most threatening target, whether it’s a healer/spellcaster or a high-damaging boss, and use Inject Venom to apply poison to your crossbow attacks. After applying poison, use Mother Nature’s Protest to ensure you’re shooting an additional projectile and Fatal Stigma to reduce healing and stack more damage.
It’s time to use Selfless Diffusion into your other damaging and weakening-applying effects such as Multi-Shot and Explosive Trap, while keeping in mind you can activate Inject Venom again to deal damage based on the amount of poison stacks. You can use Wind Snatcher at will to bind troublesome opponents and make sure they’re not getting away from you.
In PvP, however, you’re going to want to use Wind Snatcher as soon as you can to lock down agile opponents for your team to focus on; be wary that they may have ways to resist or cancel bind attacks.
The remaining skills are primarily situational. Use Nimble Leap and Shadow Strike if an opponent gets too close. You can use Nimble Leap to increase your damage as well if there isn’t an immediate threat. Camouflage Cloak is a great get-out-of-jail-free card if you’re targeted or need to get away to let your skills cool down.
Weapon mastery
For your crossbows, consider investing in the following weapon mastery trees:
- Regen: 0 points
- Move: 6 points to Cold Vision
- Chain Fire: 9 points to Brutal Wound
Reaching Brutal Wound is key as it gives a flat 5% damage boost to all ranged attacks while also increasing attack speed – all around this is the line you should prioritize. After that, level the move tree if only to grab some increased ranged hit chance.
As for your daggers, invest in the following trees:
- Disguise: 3 points to Debuff Immunity
- Poison: 3 points to Enfeebling Terror
- Assassination: 9 points to Maddening Excitement
Maddening Excitement is the best mastery skill here as you’ll want that flat attack speed buff to fire off more bolts. This line also provides some nice damage and skill buffs – valuable for a DPS build. Finally, throw 3 points into each of the other trees to grab Debuff Immunity and Enfeebling Terror, the latter of which increases weaken chance.
Guardian
The best Guardian for this crossbow/dagger build is Green Ranger Elowen. She’s a great get-out-of-jail-free card as she has a high chance to bind enemies. Attacking the bound enemies will further increase your ranged critical hit chance massively, allowing you to melt your enemies much quicker than you normally would in relative safety.
Best equipment
Don’t worry too much about equipment for this crossbow/dagger build until you’ve reached level 50. Just go with the equipment and crossbow/dagger combo that have any bonuses to Dexterity or a higher weaken chance. After that, look for armor and accessories that increase Perception. Some of the best gear can take a while to grind for, so stick with what you have closest to the equipment below best.
Best weapons
The best weapons for the crossbow/dagger Scorpion build are Queen Bellandir’s Toxic Spine Throwers and Rex Chimaerus’s Fangs.
Queen Bellandir’s Toxic Spine Throwers are great for one reason: on a critical hit, which you’re going to be proccing often, they’ll also apply poison to the target, allowing you to deal even more damage and benefit from poison synergy. They’re looted from Queen Bellandir, a world boss enemy.
Rex Chimaerus’s Fangs, on the other hand, increase weaken chance and provide a nice buff to dexterity. These are a possible drop from the Temple of Slaughter Conquest dungeon.
Best armor
The best armor for this crossbow/dagger Scorpion build is the Ghost Wolf set, which you can obtain from precious armor selection chests. Much of this set improves attack speed and weaken chance while also buffing Dexterity and Perception. Consider pairing it with the Eldritch Whispers cloak for even more attack speed – if you can find it.
Since this set is rare, focus on armor that otherwise raises Wisdom or weaken chance until you can farm for it, like the Duskblood set.
For accessories, seek out those that provide attack speed increases or bonuses to your two core attributes: Dexterity and Perception.
Best Throne and Liberty Darkblighter build
Here is our wand/dagger Darkblighter build in Throne and Liberty:
- Attribute point distribution:
- Strength: 10
- Dexterity: 30
- Wisdom: 19
- Perception: 30
- Key active skills: Touch of Despair, Inject Venom, Cursed Nightmare, Phantom Smokescreen
- Key passive skills: Wraith’s Beacon, Vampiric Contract, Murderous Energy, Destructive Fang
- Defensive skill: Block Blade
- Weapon A mastery: 3 points in Damage, 3 points in Recover, 9 points in Weaken
- Weapon B mastery: 3 points in Disguise, 3 points in Poison, 9 points in Assassination
- Guardian: Green Ranger Elowen
- Best Weapon A: Tevent’s Grasp of Withering
- Best Weapon B: Minzerok’s Daggers of Crippling
- Best armor set(s): Swirling Essence set
This Darkblighter build leans heavily into debuffing foes in both PvP and PvE from a distance. While squishy, applying stacks of Weaken: Curse damage over time and Weaken: Poison on enemies will make them much more squishy as well. This support build also slows targets and puts them to sleep, helping you manage the battlefield and take supporting enemies – such as Longbow users – out of the equation for several precious seconds.
However, this build does struggle when playing solo in PvE, as it doesn’t deal enough damage or block enough damage to complete a lot of late-game content without support. If you find you’re struggling in PvE, consider swapping out the support-focused Wand for a Crossbow for higher DPS. You do not need to edit your attributes but may want to equip gear that raises Dexterity instead of Wisdom.
Attribute points
Perception is the primary stat for this build as it increases your chance to inflict weaken and sleep, along with the chance for your attacks to connect. The soft cap is 30 so we stop there.
Likewise, Dexterity helps out with critical hit chance, which is a secondary stat for this Darkblighter build but one you shouldn’t ignore. It also gives you a higher evasion chance to help keep you alive longer.
Finally, some points into Wisdom help with mana regeneration and cooldown speed. You will get most of your Wisdom from armor sets.
We ignore strength as we’re not focused on dealing damage but rather applying status conditions and damage over time. Because this build is so squishy, we prioritize max health upgrades from accessories.
Active skills
Here are the best active skills for this wand/dagger Darkblighter build:
- Touch of Despair: Inflicts stacks that deal damage over time
- Inject Venom: Weapon attacks will inflict Weaken: Poison. Activate again to deal extra damage
- Cursed Nightmare: Decreases speed of target and then puts them to sleep
- Corrupted Magic Circle: Inflicts a damage over time curse to all targets in an area
- Curse Explosion: Deals massive damage to cursed targets and increases potency based on Touch of Despair stacks
- Karmic Haze: Spreads curses to nearby enemies
- Fatal Stigma: Reduces enemy healing and increases Weaken: Poison potency
- Blessed Barrier: Raises ally defenses
- Invincible Wall: Creates a protective shield
- Camouflage Cloak: Breaks movement impairing effects and activates Stealth
- Phantom Smokescreen: Grants self and allies 100% evasion chance
- Swift Healing: Fast-acting healing spell
Do note that some skills change dramatically when specialized in certain ways; experiment at your leisure to find which suits you best. Make sure not to impact the length and strength of your curses and poisons by doing so.
Passive skills
Here are the best passive skills for this wand/dagger Darkblinger build:
- Full of Corruption: Increases mana regeneration when curse effects end
- Devotion and Emptiness: Increases healing/skill damage by day/night
- Wraith’s Beacon: Increases curse duration
- Vampiric Contract: Allies heal upon attacking cursed enemies
- Assassin’s Step: Increases mana regeneration and movement speed upon enemy defeat
- Murderous Energy: Increases poison duration/damage by day/night
- Destructive Fang: Decreases defenses of poisoned targets upon attack
- Assassination Stance: Reduces cooldown of Camouflage Cloak upon evade
Defensive skill
The dagger’s defensive skill Block Blade wins out over the Wand’s defensive skill Chaotic Shield simply because it provides more mobility and adds stacks of poison on a successful block. It also allows the user to stealth if used with directional inputs, providing far more mobility to reposition this squishy build out of danger.
Skill upgrade priority
As for the priority for which you should upgrade the aforementioned action skills for this wand/dagger Darkblighter build, you should focus on damaging skills at lower levels. Do note that some skills, such as Phantom Smokescreen, unlock at a higher rarity, so you don’t have to worry about upgrading them from Uncommon to Epic.
The exception to this rule is Cursed Nightmare: upgrading this skill early on will increase the duration for which your enemy is put to sleep, so after upgrading Touch of Despair to Rare, level Cursed Nightmare before moving onto Inject Venom, Corrupted Magic Circle, Curse Explosion, and Karmic Haze. Get them all to Rare before moving on.
After that, level your utility, defensive, and healing skills as you see fit. They won’t be potent enough to matter much until after clearing the main story quest.
For passive skills, focus on Full of Corruption, Murderous Energy, and Destructive Fang before moving onto Wraith’s Beacon. After getting them to Rare,t upgrade the remaining passives as you see fit.
Skill rotation
Now that we’ve gotten the best skills out of the way, the rotation in both PvP and PvE encounters is much the same for this wand/dagger Darkblighter build. It only depends if you’re up against one foe or many.
At the start of each encounter in both PvE and PvP, you’ll want to use Touch of Despair to begin building the damage over time. Then, use Inject Venom to add poison to your attacks. Add in Corrupted Magic Circle if against one enemy but save for when multiple are together if facing a group. With both damage over time and poison stacked on your opponent, cast Curse Explosion to deal massive damage and increase the potency of your damage-over-time effects.
In PvE against weaker mobs, avoid using Cursed Nightmare as it will only prolong the battle. Against stronger foes, however, it’s great to cast to buy yourself time. Touch of Despair does not waken sleeping enemies so you can continually build it before casting Curse Explosion for a guaranteed critical hit.
In PvP, save Cursed Nightmare to interrupt your opponent or put to sleep an opposing caster to stop them from debuffing and healing. It is by far your strongest tool – make sure to select the Enhanced Nightmare specialization for this skill in PvP.
The other active skills are situational. Karmic Haze and Fatal Stigma are best used when several enemies are grouped near each other and Touch of Despair is on cooldown. Blessed Barrier, Invincible Shield, and Phantom Smokescreen are both great when bosses are winding up a powerful move or an opponent has debuffed your allies. The same goes for Swift Healing which should be used in an emergency – you’re not a healer, remember.
Camouflage Cloak should be saved for when PvE enemies aggro onto you or if you need to escape from sight in PvP.
Weapon mastery
For your wand, you’ll want to distribute your points as follows:
- Damage: 3 points to Witch’s Contract
- Recover: 3 points to Deep Pain
- Weaken: 9 points to Spell of Retribution
The Weaken line is by far the most important as it comes with additional weaken chance, which will make your curses and poisons more reliable. As there’s no more room in this skill tree, spending for Witch’s Contract and Deep Pain will give you a little bit more damage output and a higher magical critical hit chance of basic attacks.
For your daggers, you’ll want to distribute your points as follows:
- Disguise: 3 points to Debuff Immunity
- Poison: 3 points to Enfeebling Terror
- Assassination: 9 points to Maddening Excitement
The Assassination line helps this build out as it leans heavily into applying debuffs but leaves behind base damage and attack speed. Maddening Excitement helps alleviate that weakness a little bit while the other two options still provide weaken chance upgrades and some debuff duration decreases when afflicted on you.
Guardian
The best Guardian for the wand/dagger Darkblighter is Green Ranger Elowen. Elowen has a high chance to Bind all foes in a small radius for 5 seconds, which will give you ample time to stack Touch of Despair and poison on them. Furthermore, she gives your squishy character time to recover if you’re being overwhelmed.
Lady Knight Hamarashea isn’t a bad choice either as she provides a massive cooldown bonus and creates a defensive shield at the expense of your mana.
Best equipment
Don’t worry too much about equipment for the wand/dagger Darkblighter build until you’ve reached level 50. Just go with the equipment and wand/dagger combo that add the most to your Wisdom attribute and any accessories that increase maximum health. Even after that, some of the best gear can take a while to grind for, so stick with what fits the equipment below best.
Best weapons
The best weapons for the wand/dagger Darkblighter build are Tevent’s Grasp of Withering and Minzerok’s Daggers of Crippling.
Not only does Tevent’s Grasp of Withering add to your Wisdom attribute, but it also has a 15% chance to apply a Weaken: Curse damage over time effect on enemies. It is dropped by the World Boss enemy Tevent in the Ruins of Turayne.
Minzerok’s Daggers of Crippling also increases the Wisdom attribute and adds a Weaken: Curse with an 8% chance to decrease your opponent’s defenses for several seconds. It is dropped by Minezerok in the Shadowed Crypt.
Best armor
The best armor set for this wand/dagger Darkblighter build is the Swirling Essence set. This set increases all aspects of the Weaken status effect, which includes the damage over time from Touch of Despair and poison, from chance to inflict to potency. All 4 pieces also give an attack range increase, keeping you out of danger when in PvP or against boss enemies.
Since this set is rare, focus on armor that otherwise raises Wisdom or weaken chance until you can farm for it, like the Elusive Hexweaver set which helps with sleep chance.
For accessories, seek out the gear that provides the most max health alongside any bonuses to debuff status effects or give additional Wisdom or Perception.
And those are the best builds we’ve got for Throne and Liberty – keep in mind that, with a game this young, these builds are great jumping-off points to keep you on track from the very first moments in Kasteton to late-game dungeons and raids. While certainly fun, we’re still debating whether or not Throne and Liberty is one of the best MMORPGs you can play on PC in 2024 – what do you think?